Installation Guide

Septic System Installation

A complete step-by-step guide to installing a new septic system. Learn about the process, costs, permits, and how to choose the right contractor for your project.

Installation Process

Installing a septic system is a complex process that requires careful planning and professional expertise. Here's what to expect at each stage.

1

Site Evaluation

A thorough site evaluation is the foundation of a successful septic installation. This step determines if your property can support a septic system and what type will work best.

  • Soil Test: Analysis of soil composition and drainage capability
  • Perc Test: Measures how quickly water absorbs into the soil
  • Site Survey: Maps property boundaries, setbacks, and obstacles
Soil testing and site evaluation for septic system
2

System Design

Based on the site evaluation results, a septic system designer creates a customized plan that meets your household needs and local regulations.

Size Calculation

Based on bedrooms and daily water usage

Type Selection

Conventional, aerobic, or mound system

Layout Planning

Optimal placement of tank and drain field

3

Permits & Approvals

Before construction can begin, you must obtain all necessary permits from local authorities. This process ensures your system meets health and safety standards.

Local Health Department Building Permits Environmental Clearance
4
Excavation for septic tank installation

Excavation

Heavy equipment is used to excavate the areas where the septic tank and drain field will be installed. Proper excavation is critical for system longevity.

  • Tank Hole: Excavated to exact specifications for tank size
  • Drain Field Trenches: Dug at proper depth and slope
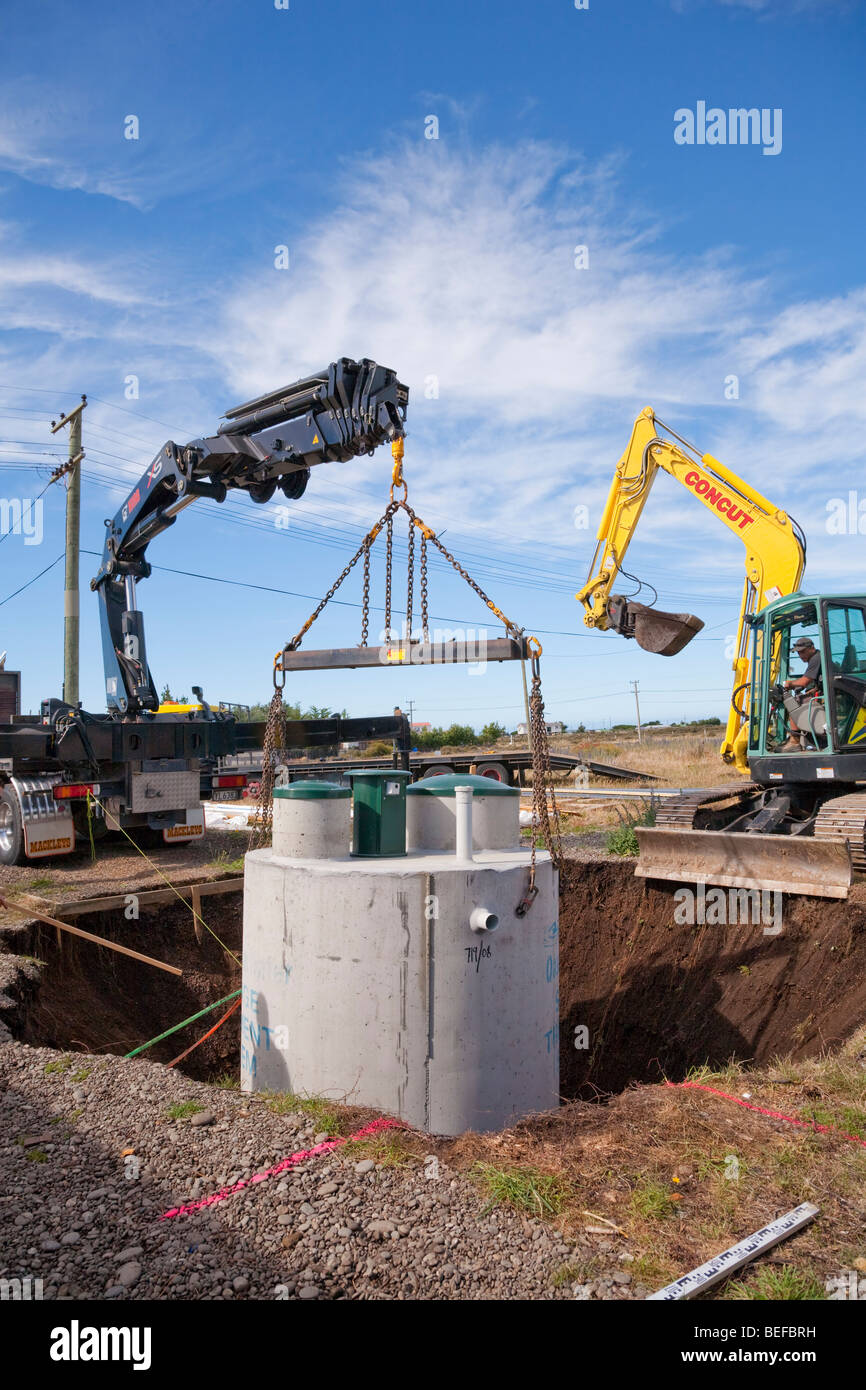
5

Tank Installation

The septic tank is carefully placed in the excavated hole and connected to your home's plumbing system. This is one of the most critical steps in the installation.

  • Tank Placement: Leveled and positioned correctly
  • Connection: Linked to house sewer line
  • Backfill: Properly compacted around tank
Concrete septic tank being lowered into place
6

Drain Field Construction

The drain field (also called leach field) is where wastewater is naturally filtered and returned to the groundwater system. Proper construction is essential.

Distribution Box

Evenly distributes effluent to leach lines

Leach Lines

Perforated pipes in gravel bed

Final Grading

Proper slope for drainage

7

Final Inspection

A local health department inspector verifies that the installation meets all codes and regulations before the system is approved for use.

System Testing Official Approval Documentation

Installation Cost Breakdown

Understanding the costs involved helps you budget appropriately for your septic system installation. Prices vary based on system type, soil conditions, and location.

Component Cost Range
Site Evaluation $300 - $1,000
Permits $200 - $500
Tank (1,000 gal) $1,000 - $2,500
Drain Field $2,500 - $10,000
Installation Labor $2,000 - $5,000
Total $6,000 - $19,000

Factors Affecting Cost

Soil Conditions

Rocky or clay-heavy soils require more extensive preparation and may need specialized systems.

System Size

Larger homes require bigger tanks and drain fields, increasing material and labor costs.

Location & Access

Remote locations or difficult access can increase transportation and equipment costs.

System Type

Advanced systems like aerobic treatment units cost more than conventional gravity systems.

Permit Requirements

Permits ensure your septic system meets health and safety standards. Requirements vary by location and system type.

Local Health Department

Most areas require approval from the county or city health department before installation begins.

  • Site evaluation approval
  • System design review
  • Final inspection

Building Permits

Construction permits may be required for excavation and plumbing work associated with the installation.

  • Excavation permit
  • Plumbing permit
  • Electrical (if applicable)

Environmental Clearance

Properties near wetlands, water bodies, or protected areas may need additional environmental approvals.

  • Wetland assessment
  • Water quality review
  • Setback verification

Pro Tip

Start the permit process early, as approvals can take 2-4 weeks or longer. Your contractor can often handle permit applications as part of their services.

Choosing the Right Contractor

Selecting a qualified, experienced contractor is crucial for a successful installation. Use this checklist to evaluate potential contractors.

Contractor Checklist

Homeowner meeting with septic contractor
3+
Get Multiple Quotes
5+
Years Experience
100%
Licensed & Insured
A+
Better Business Bureau

Installation Timeline

Understanding the timeline helps you plan accordingly. Here's a typical schedule for a residential septic system installation.

Site Evaluation
1-2 Days
Design & Permits
2-4 Weeks
Installation
3-5 Days
Final Inspection
1 Day
Total Project Duration
3-6 Weeks
View Cost Calculator

Weather delays: Rain or frozen ground can extend the timeline significantly.

Permit timing: Some jurisdictions may take longer to approve permits.

Ready to Learn More?

Explore our comprehensive guides on maintenance, troubleshooting, and costs to keep your septic system running smoothly.