Comprehensive Guide

Septic System Inspection

Learn how to perform DIY inspections and understand what professionals look for. Keep your system running smoothly with regular checkups.

Inspection Options

DIY vs Professional Inspection

Understand the differences between what you can check yourself and when to call in the experts.

DIY Inspection

Free
Homeowner performing DIY septic inspection
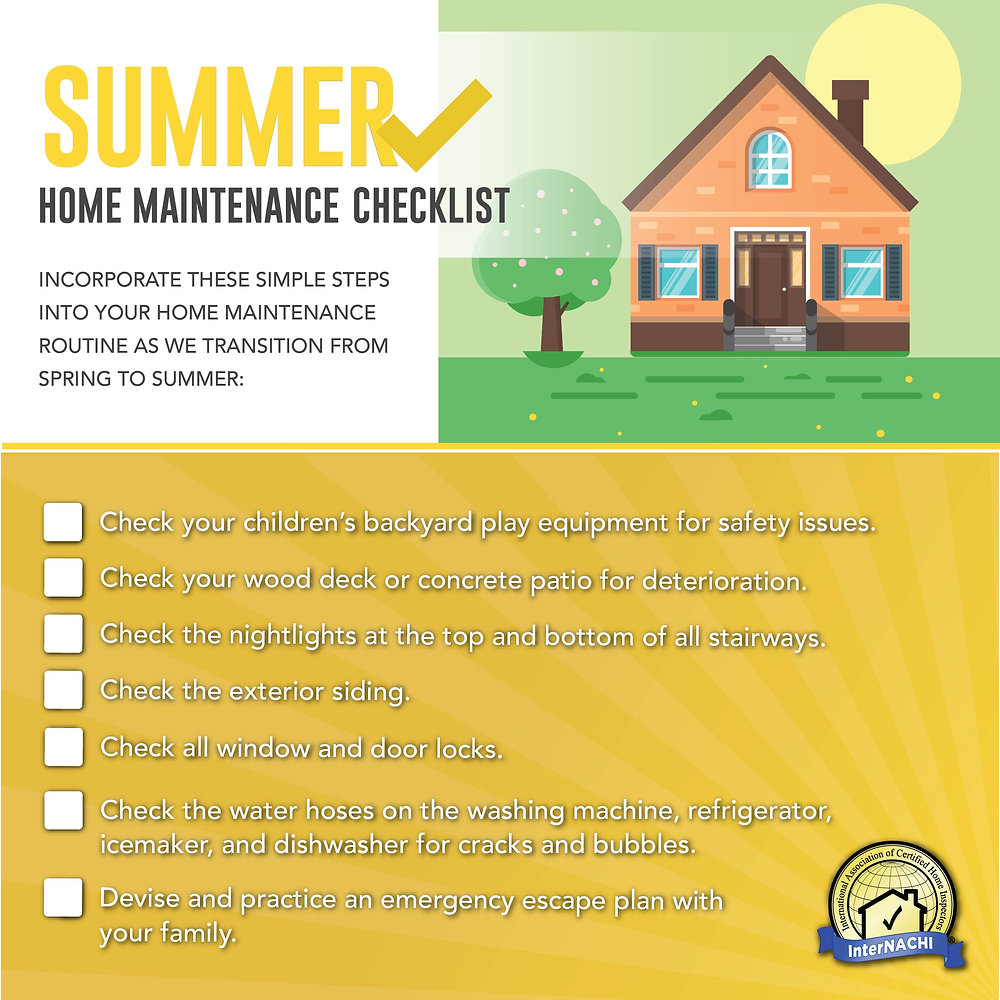
  • Visual yard check for wet spots
  • Monitor drain speed in sinks and tubs
  • Check for sewage odors indoors and out
  • Look for unusually green grass patches
Cost: Free
Monthly

Professional Inspection

Recommended
Professional septic inspector at work
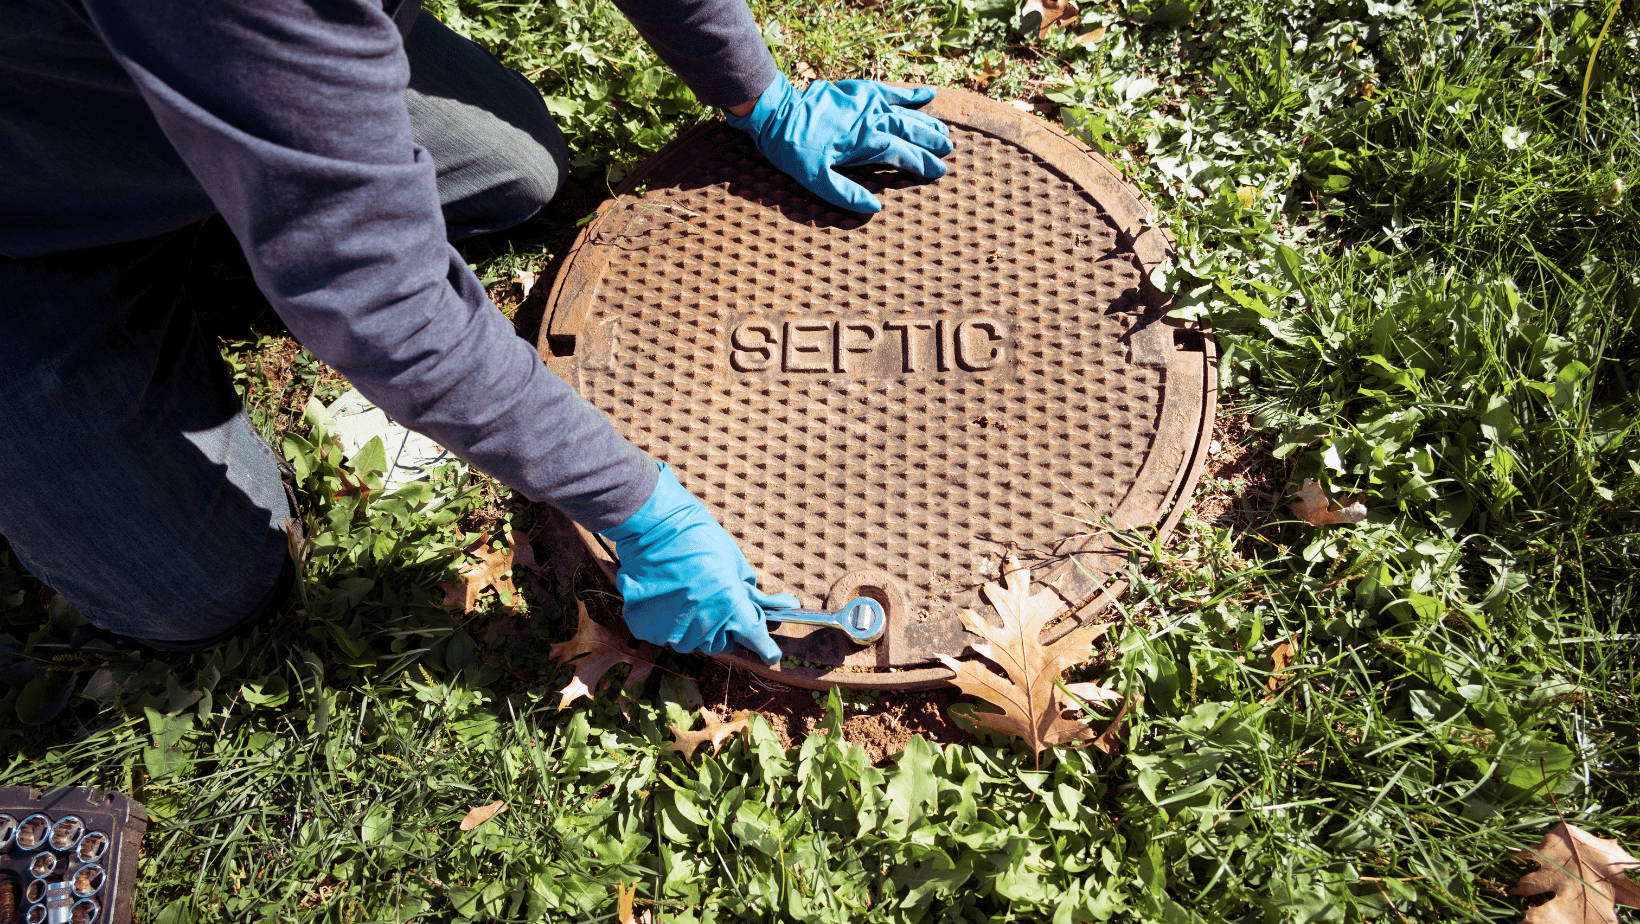
  • Tank pumping and thorough inspection
  • Baffle check (inlet and outlet)
  • Complete drain field evaluation
  • Distribution box inspection
Cost: $200-$500
Every 1-3 Years
Monthly Check

DIY Inspection Checklist

Complete this simple checklist every month to catch potential problems early.

Checklist Progress 0/6 Complete

Check for standing water in yard

Look for puddles or soggy areas near the drain field

Monitor all drain speeds

Sinks, tubs, and toilets should drain quickly

Sniff for sewage odors

Check indoors and outdoors for any unusual smells

Look for unusually green grass

Extra-green patches may indicate drain field issues

Listen for gurgling sounds

Gurgling from drains or toilets can signal problems

Check toilet flush performance

Toilets should flush completely without hesitation

Learn What Pros Check
Professional Standards

What Inspectors Look For

Understanding the professional inspection process helps you know what to expect.

Tank Condition

Structural integrity and sludge levels

  • Cracks or Leaks: Inspectors check for structural damage, cracks in walls, or leaks at seams and joints.
  • Sludge Levels: Measures sludge and scum layers. Pumping needed when sludge reaches 1/3 of tank depth.
  • Liquid Level: Checks that liquid level is at proper height for optimal system function.

Baffle Inspection

Inlet and outlet baffles

  • Inlet Baffle: Ensures proper flow into tank and prevents short-circuiting of waste.
  • Outlet Baffle: Prevents sludge and scum from entering the drain field.
  • Condition Check: Verifies baffles are intact, not corroded, and properly positioned.

Drain Field Evaluation

Soil absorption and biomat assessment

  • Saturation Level: Checks for over-saturation that indicates system failure or hydraulic overload.
  • Biomat Assessment: Evaluates the biological mat that forms in the soil for proper thickness.
  • Vegetation Check: Looks for appropriate grass cover and absence of trees or shrubs with invasive roots.

Distribution Box Inspection

Level and outlet condition

  • Level Check: Ensures the box is level so effluent distributes evenly to all drain lines.
  • Outlet Clearance: Verifies all outlets are clear of debris and flowing properly.
  • Structural Integrity: Checks for cracks, root intrusion, or damage to the distribution box.

Plumbing Inspection

Connections, venting, and backups

  • Connection Check: Inspects all pipe connections from house to tank for leaks or damage.
  • Venting System: Ensures proper venting to prevent pressure buildup and odor issues.
  • Backup Prevention: Tests for any signs of backup or slow drainage in the system.
Documentation

Inspection Report Sample

A professional inspection report should include these key sections.

Septic System Inspection Report

Sample Documentation

Property Address 123 Main Street, Anytown, ST 12345
Inspection Date January 15, 2024
Inspector John Smith, Licensed Septic Inspector #SE-12345
System Type Conventional Gravity-Fed System
Overall Condition Good Condition
Key Findings
  • Tank sludge level at 15% - pumping not yet required
  • All baffles intact and functioning properly
  • Minor vegetation near drain field - recommend monitoring

Report Should Include:

  • Property Information Address, lot size, system location
  • Inspector Details Name, license number, company
  • System Specifications Type, age, tank size, components
  • Detailed Findings Condition of each component
  • Recommendations Maintenance needs and next steps
Schedule

How Often to Inspect

Follow this timeline based on your system's age and condition.

New Systems (0-2 years)

Annual Inspection

New septic systems should be inspected annually for the first two years to ensure proper settling and function.

  • Check for proper bacterial establishment
  • Monitor for any installation issues

Established Systems (3-15 years)

Every 3 Years

Systems in good working order typically need professional inspection every 3 years, along with pumping as needed.

  • Standard maintenance schedule
  • Continue monthly DIY checks

Older Systems (15+ years)

Every 1-2 Years

Aging systems require more frequent monitoring. Components may begin to deteriorate and need attention.

  • Watch for signs of component failure
  • Consider system upgrade planning

Before Home Purchase

Always Required

Always get a professional septic inspection before purchasing a home with a septic system. This protects your investment.

  • Required by most lenders
  • Negotiate repairs or price adjustments

Ready to Schedule an Inspection?

Find a licensed septic professional in your area.

Find Inspectors